Trello to Jules Automation
A comprehensive guide to automating your workflow between Trello and Jules
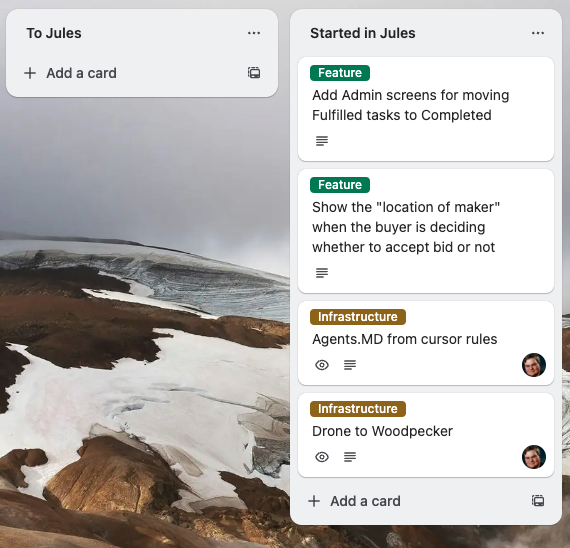
Setting Up Two New Lists in Trello
Begin by creating two new lists in your Trello board.
- The first list should be named "To Jules" - this will serve as the intake queue for tasks you want to send to Jules for AI-powered development.
- The second list should be named "Started in Jules" - this will act as a tracking list for tasks that have been successfully submitted to Jules.
These two lists form the foundation of your automated workflow, allowing you to maintain visibility over which tasks are queued and which are actively being processed by Jules.
Getting the Info You Need
Before you can automate the workflow, you'll need to gather several API keys and references.
First, obtain your Trello API Key and Token
You can get this from the Trello developer portal. However, the exact series of clicks you need to make depends on your Trello account. You might need to create a named App or Plugin first. It's worth noting that the Trello UI changes regularly, and, at time of writing, the instructions within N8N on how to do this aren't correct.
Next, you'll need the board IDs
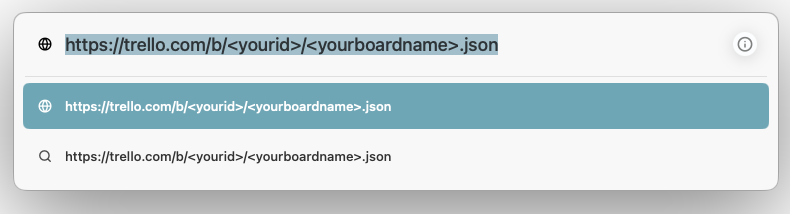
The easiest way to get these is to open the board, then edit the URI to add ".json" at the end.
Then you'll have to go through the JSON to find the text "To Jules", where you'll see a couple of blocks that looks like:
    "list": {
        "name": "To Jules",
        "id": "~this is the first ID you want~"
        },
    },
and
        "list": {
            "name": "Started in Jules",
            "id": "~this is the other ID you want~"
            },
        }
    },
Finally, you'll need to create a new Jules API Key
Go to Jules Settings, find the "API Key" section, and click "Create Key"
Keep these credentials securely but readily accessible for the next configuration step. (I tend to copy/paste them into a "new document" in Cursor that I don't actually save.)
Setting Up the N8N Authentication and Tasks
Authentication
You need to set up authentication to Trello within N8N. From the N8N UI, click on the + sign next to the N8N logo, and select "Credential". From the dropdown that appears, select "Trello"
There are two ways to do this. One uses callback triggers from Trello, and the other uses a schedule trigger.
We'll use the schedule trigger for this guide. This is very slightly more complex, but means that your N8N endpoint is not exposed to the public internet In 2025, this isn't a common security requirement, but it might be.
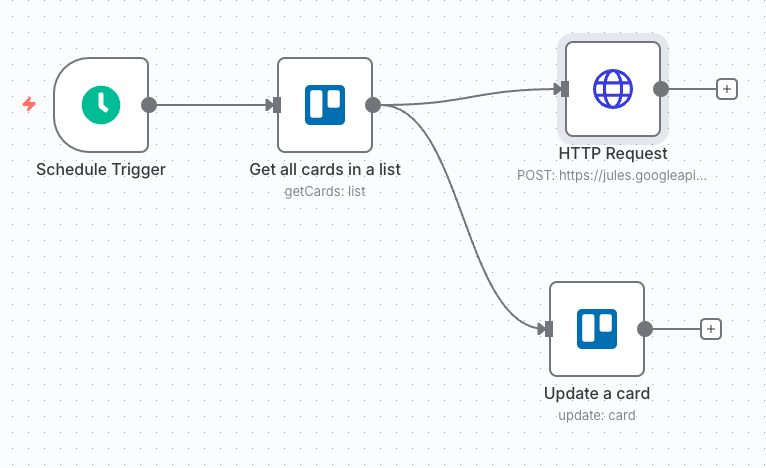
Now you'll configure the automation workflow in N8N with four key components:
A schedule trigger
This is a standard N8N type of trigger. We tend to set ours to about every 5 minutes while we're developing and testing the workflow, and then set to run much more frequently in production.
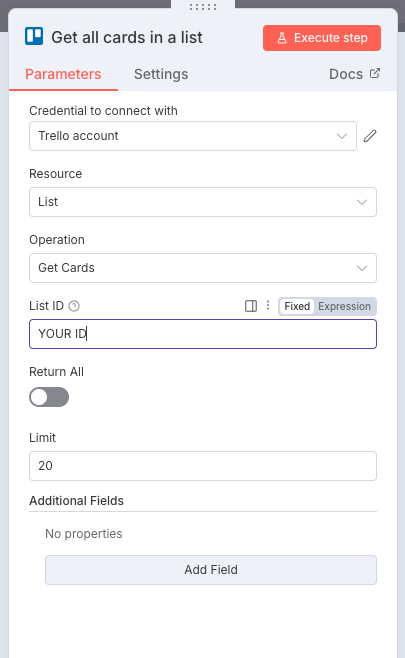
A task to get all the cards in a list
This is, again, a standard N8N type of task.
On the "parameters" tab, you'll need to fill in the following
- Credentials: The name of the credential you just created
- Resource: List
- Operation: Get cards
- List ID: The ID of the "To Jules" list you noted in Step 2 above.
- You can leave other parameters as their defaults.
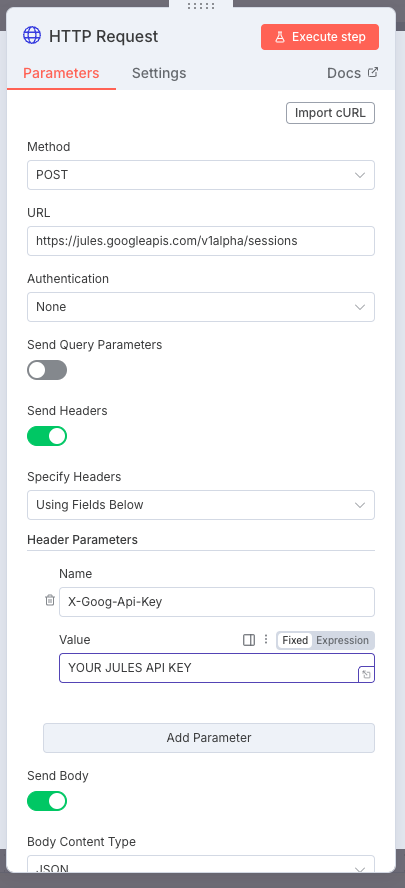
An http request task to create the Jules task
N8N doesn't have a built-in task to create a Jules task, so we'll use an HTTP request task.
You'll need to add the following in the "Parameters" tab:
- Method: POST
- URL: https://jules.googleapis.com/v1alpha/sessions
- Authentication: None - yes really, Google has a subtly different way of authentication which we'll add below
- Send Query Parameters: No
- Send Headers: Yes
- Specify Headers: "Using fields below" (this is a dropdown option)
- Header Parameter / Name: X-Goog-Api-Key
- Header Parameter / Value: The API key you created in Step 2
- Send Body: Yes
- Specify Body: Using JSON (this is a dropdown option)
- JSON: The following. You need to include that as is, including the double curly
braces, which are part of N8N's syntax. You will, however, need to replace the
github username and repo name. And you might need to replace the name of the
starting branch. (The branch that Jules will use to create the code it is editing.)
{
    "prompt": {{ JSON.stringify($json.desc) }},
    "sourceContext": {
        "source": "sources/github/YOURGITHUBUSER/YOURREPONAME",
        "githubRepoContext": {
        "startingBranch": "main"
        }
    },
    "title": {{ JSON.stringify($json.name) }}
}
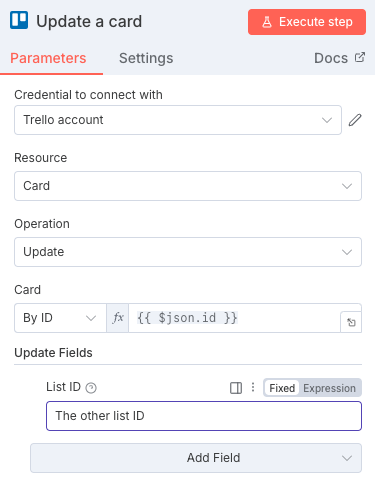
A Trello task to move the card to the "Started in Jules" list.
This last step is necessary because we're using a schedule trigger - if we were using a webhook triggered by Trello list changes, this step wouldn't be required.
You'll need to add the following in the "Parameters" tab:
- Credential...: The same one as earlier
- Resource: card
- Operation: update
- Card / By ID: An expression of "{{ $json.id }}" (again, including the double curly braces)
- Update fields / List ID / Fixed: The ID of the "Started in Jules" list you noted in Step 2 above.
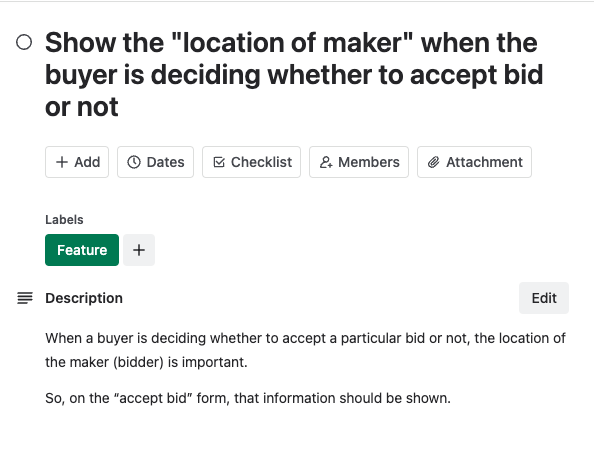
Using It
Now you're ready to use the automation! The workflow is straightforward:
Firstly create a card in Trello
This should have a descriptive title for your task, which will be used as the title of the Jules job.
The Trello detail will be used as the prompt for the Jules job. Ideally, the "How to" part of this will already exist in your repo in an agents.md or similar. However, if it doesn't, or you otherwise want to be more prescriptive, this is the place to include it.
Then, drag the card to the "To Jules" list.
Once the scheduled trigger runs, your automation will pick up the card, create the corresponding task in Jules, and move the card to your "Started in Jules" list for tracking.

The Limitations
It's important to understand the current limitations of this workflow.
First, context matters - your repository should already have at least an agents.md file to provide context for Jules.
Second, you can't complete a Jules task via API; you must log into the Jules UI to create a pull request.
Third, you need to choose a particular Jules account for this automation, as the API authentication is user-specific.
Finally, Jules ties you in to Gemini, which until Gemini 3.0 is released, isn't the perfect model for coding tasks. These constraints are worth considering when planning your automation strategy.